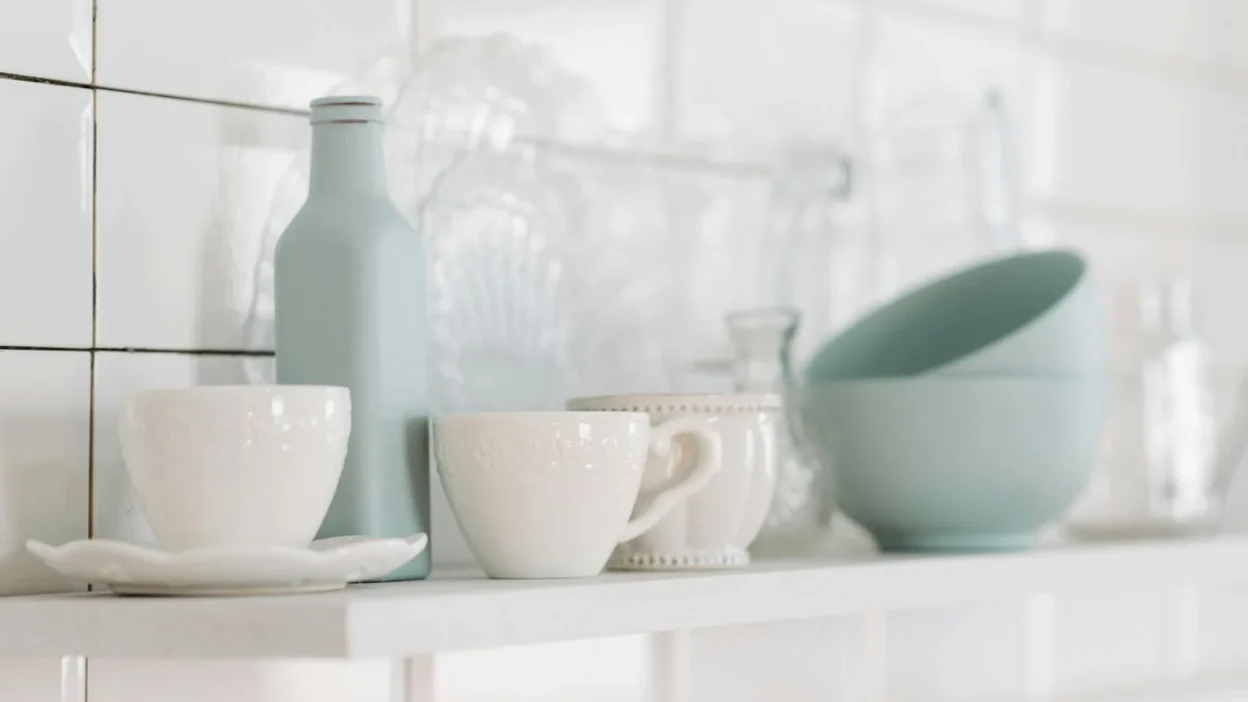
Most advice on styling kitchen shelves tells you what to add. The real secret to a display that looks both beautiful and effortless, however, is knowing what to leave out. A perfectly styled open shelf isn’t about cramming in every pretty bowl or trendy cookbook; it’s a careful edit that balances visual weight, creates pleasing height variations, and—critically—still functions as a practical part of your kitchen. This guide breaks down that process into a simple, actionable kitchen shelf styling checklist built on three core principles. Think of it as your toolkit for creating a display that feels curated, not cluttered, and works as hard as it looks.
Here’s how to style kitchen shelves for balance, height, and function. Start by clearing everything off. Then, apply the ‘toolkit’ of three principles: visual weight for balance, varying heights for rhythm, and prioritizing daily-use items for function. Finally, follow a simple 5-step routine to layer items back on, checking each principle as you go.
Your 3-Part Styling Toolkit (Before You Start)
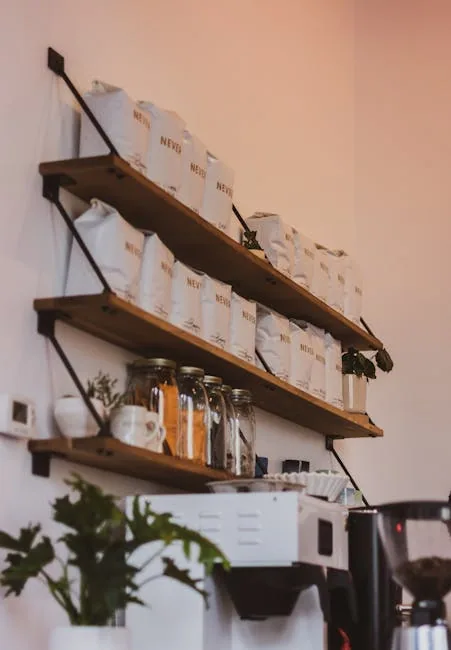
Photo by Luis Ruiz on Pexels
Before you place a single item back, think of these three principles as your essential tools. They’ll guide every decision you make, turning a random assortment of stuff into a deliberate display.
1. Balance (Visual Weight)
This isn’t about physical weight, but how heavy an object looks. A dark ceramic jug, a stack of hardcover cookbooks, or a large wooden bowl has high visual weight. A clear glass, a white plate, or a small plant has low visual weight. The goal for your kitchen display balance is to distribute this weight evenly across your shelves so nothing feels lopsided or like it’s about to tip over visually.
2. Height (Creating Rhythm)
A row of identical mugs is orderly but boring. A line of varying-height items creates visual interest and rhythm. Think of your shelf like a skyline—you want a mix of tall spires (a vase, a canister), medium buildings (a stack of bowls, a small lamp), and low structures (a single plate, a trivet). This variation in height keeps the eye moving and prevents a flat, static look.
3. Function (The Non-Negotiable)
These are kitchen shelves, not a museum exhibit. Their primary job is to hold items you use. Beautiful styling that makes you wrestle a coffee mug out of a precarious stack is a fail. Your most-used items—everyday dishes, favorite mugs, cooking oils—aren’t obstacles to your decor; they are the foundation of it. A good open shelf styling checklist always starts with function.
The 5-Step Styling Routine
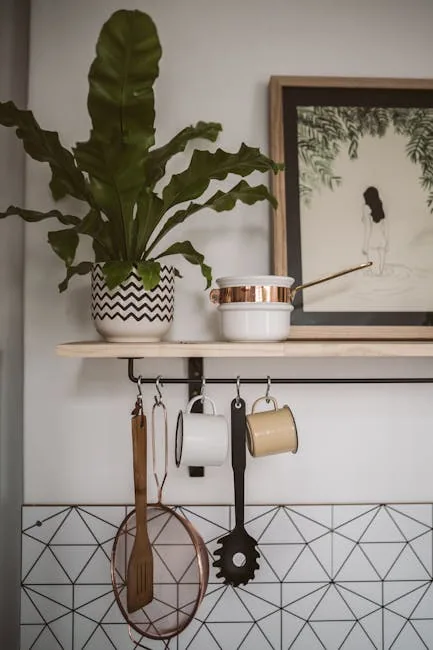
Photo by Taryn Elliott on Pexels
Now, let’s apply your toolkit. This routine turns theory into action. Clear a Saturday morning, put on some music, and follow these steps in order.
Step 1: Clear & Clean
Do: Take everything off the shelves. Wipe them down. Start with a literal blank slate.
Don’t: Try to style around items already in place. You need to see all your components at once.
Step 2: Anchor with Function
Do: Place your daily-use items first. Put your most-used mugs, everyday plates, and essential bowls where they’re easiest to grab. Group like items (all mugs together, all bowls together).
Don’t: Start with the decorative vase or the heirloom pitcher. If you build around decor, you’ll sacrifice usability.
Step 3: Build Height & Layers
Now, introduce your “skyline.” Place a taller item, like a cookbook stand or a vase, behind or next to a group of shorter functional items. Use styling kitchen shelves tricks like stacking plates or nesting bowls to create medium-height elements. Lean a cutting board or tray against the back wall to add a layer.
Step 4: Check Balance
Step back. Squint. Does one side look visually “heavier”? If you have a dark, heavy item on the left, balance it with another dark item or a cluster of medium-weight items on the right. This is where you fine-tune your shelf display balance. It doesn’t have to be perfectly symmetrical, just steady.
Step 5: Edit & Finalize
This is the secret sauce. Remove at least one or two things. Often, we add one item too many. Ask yourself: Does every item serve a purpose (either functional or beautiful)? If something feels off, it’s usually because there’s too much. Walk away for 10 minutes, then look with fresh eyes.
Quick-Fix Scenarios for Common Shelf Problems
Even with the best routine, you might step back and think, “Hmm, something’s off.” Here’s how to diagnose and fix the most common issues using your toolkit.
Problem: “My shelves look cluttered.”
Diagnosis: You’ve likely violated the “Edit” step and have too many items competing for attention.
Fix: Remove 3-5 items entirely. Aim for about 30% negative space (empty shelf surface) around your groupings.
Problem: “Everything is the same height.”
Diagnosis: You’re missing the “Height” principle, creating a monotonous line.
Fix: Introduce one tall anchor piece per shelf, like a vertical stack of cookbooks or a tall vase. Use bookends or stands to prop items up.
Problem: “It looks lopsided.”
Diagnosis: Your kitchen display balance is off. Visual weight is concentrated in one spot.
Fix: Identify the heaviest-looking item. Either move it closer to the center, or add a similarly “weighty” item (in color or size) to the opposite side of the shelf or the shelf above/below.
Problem: “My daily stuff ruins the look.”
Diagnosis: You’re seeing function and decor as enemies, not allies.
Fix: Upgrade your functional items. Use pretty, matching canisters for flour and sugar. Invest in a cohesive set of dinnerware for your open shelves. Let your daily tools be the stars.
Your Final Checklist Before You Walk Away
Before you call it done, run through this quick mental audit. If you can answer “yes” to most of these, your kitchen shelf arrangement is a success.
- Is there a clear variation in object heights (tall, medium, low)?
- Is the visual weight distributed so no single area feels like it’s pulling the eye too hard?
- Can I easily grab my everyday coffee mug and dinner plate without rearranging things?
- Have I left enough “breathing room” (negative space) around groups of items?
- Does the overall look feel intentional, not like things were just set down randomly?
- If I added one more thing, would it make it better or worse? (The answer is usually worse.)
Styling is a Process, Not Perfection
The goal of this kitchen shelf styling checklist isn’t to create a frozen, untouchable display. It’s to give you a framework for making choices that lead to shelves you love living with. Your arrangement will evolve—you’ll get a new piece, your needs will change. That’s good.
Live with your styled shelves for a few days. Use them normally. You’ll quickly see what works and what doesn’t. Tweak as needed, using the principles of balance, height, and function as your guide. In the end, the most beautiful shelf is the one that works seamlessly for you, every single day.