You know the feeling. You’re chopping vegetables for dinner, and your own shadow falls across the cutting board. You’re trying to read a recipe on your phone, but the glare from the single, harsh ceiling fixture makes you squint. Your kitchen, the heart of your home, feels more like a poorly lit interrogation room than a warm, functional space. The problem isn’t your kitchen’s size or layout—it’s the lighting. For too long, the idea of fixing it has felt daunting, synonymous with hiring an electrician, opening up walls, and a budget-busting remodel. But what if the most transformative upgrade was also one of the most accessible? A layered kitchen lighting refresh isn’t about starting from scratch; it’s the strategic, often surprisingly simple process of working with what you have and making smart additions to build light where you actually need it. This guide will show you how to move beyond that one overwhelming bulb and create a kitchen that is both brilliantly functional and beautifully inviting, without a single rewiring project unless you choose one.
A layered kitchen lighting refresh is the process of strategically combining ambient (general), task (focused), and accent (decorative) light sources to eliminate shadows, reduce eye strain, and enhance your kitchen’s atmosphere. You can achieve this by assessing your current setup and making targeted upgrades to fixtures, like adding plug-in pendants or under-cabinet LED strips, to build a more functional and beautiful space without a full renovation.
The Big Myth: Layered Lighting is Only for New Builds
Let’s start by dismantling the biggest barrier to a better-lit kitchen: the belief that effective, layered lighting requires a construction crew, new wiring runs, and a mountain of drywall dust. This myth stops many homeowners before they even start. The reality is that a kitchen lighting upgrade guide today is less about demolition and more about smart, strategic additions.
The “refresh” in layered lighting for kitchens is your permission slip to work with what you have. You don’t need to rip out your ceiling to add task lighting; modern, plug-in under-cabinet light strips install with adhesive and plug into an outlet. You don’t need to hire an electrician for a new island pendant; a swag kit allows you to hang a plug-in fixture from an existing ceiling hook or outlet. Even accent lighting, like battery-operated puck lights for inside glass cabinets or motion-sensor toe-kick lights, requires no wiring at all.
This approach shifts your mindset from a major renovation to a series of manageable upgrades. The goal is to enhance function and atmosphere by filling the gaps in your existing setup, not to start from a blank slate. For any project involving plug-in fixtures or basic wiring, always prioritize safety. If you’re unsure, consulting a guide on basic electrical safety from a reputable source like The Family Handyman is a wise first step.
Your Kitchen’s Lighting Layers, Demystified
Think of kitchen lighting layers like ingredients in a great recipe. Each one serves a distinct purpose, and together they create a balanced, functional, and inviting whole. Once you understand these three core components, planning your refresh becomes intuitive.

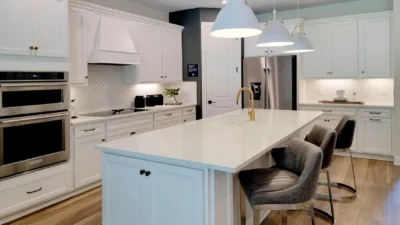
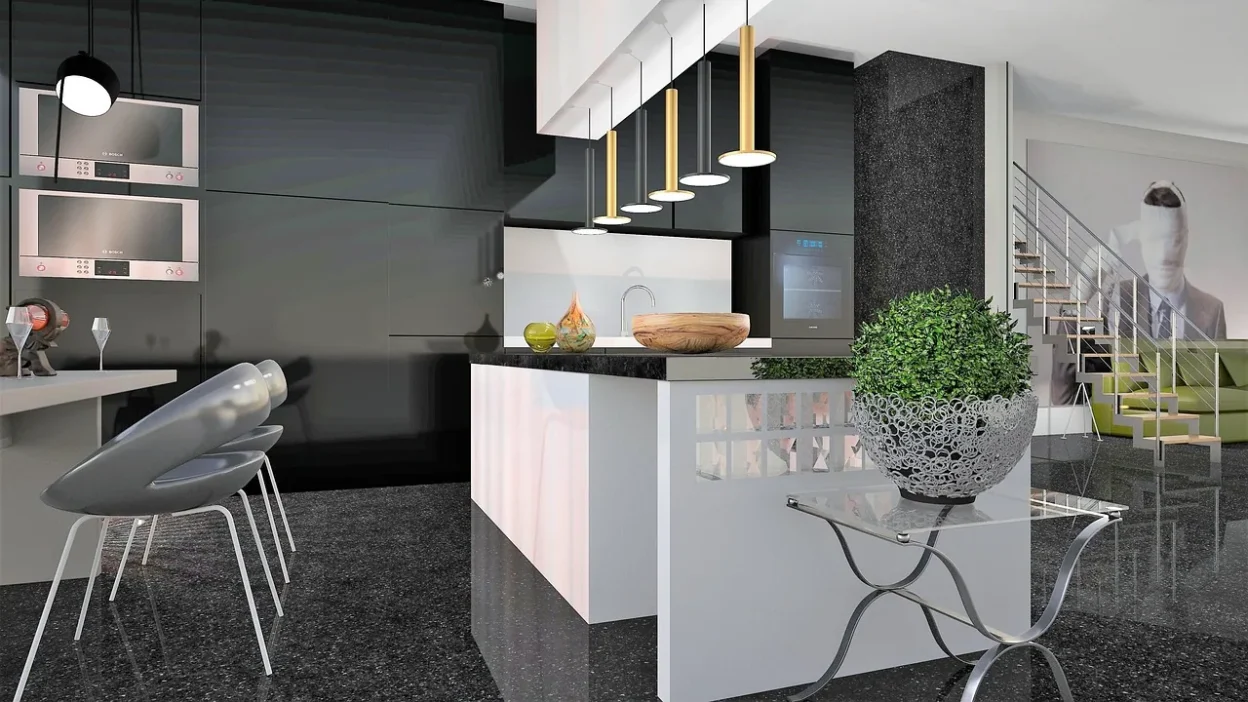
1. Ambient Lighting (The Overall Glow)
This is your base layer—the general illumination that replaces sunlight and allows you to move around the room safely. It should be soft, diffuse, and shadow-free. Common sources in a kitchen include a central ceiling fixture (like a flush mount or chandelier), recessed downlights (aka “can lights”), or track lighting. The key for a refresh is often not adding more ambient light, but gaining control over it with a dimmer switch to adjust the intensity for different times of day.
2. Task Lighting (The Functional Spotlight)
This is where the magic happens for actually using your kitchen. Task lighting provides focused, bright, and shadow-free light right where you need it for specific activities. Its sole job is to make cooking, cleaning, and prepping easier and safer. The most critical application is under-cabinet lighting for countertops. Other key task lights include a pendant or linear fixture over a kitchen island or sink. Proper kitchen lighting design layers ensure no crucial workspace is left in the dark.
3. Accent Lighting (The Decorative Highlight)
This is the jewelry of your kitchen illumination refresh. Accent lighting adds depth, drama, and personality by drawing attention to architectural features or decor. It’s not about overall brightness but about creating visual interest. Examples include LED strip lights inside open shelving or glass-front cabinets to showcase dishes, subtle toe-kick lighting to make the floor seem like it’s floating, or a small directional spot to highlight a piece of art or a beautiful backsplash.
The ‘Before You Buy’ Scenario: Assessing Your Kitchen’s Light Personality
Effective planning starts with observation, not a shopping cart. Grab a notepad and spend some time in your kitchen during the times you use it most—both day and night. This simple kitchen light planning guide is about diagnosing your space’s unique “light personality.”
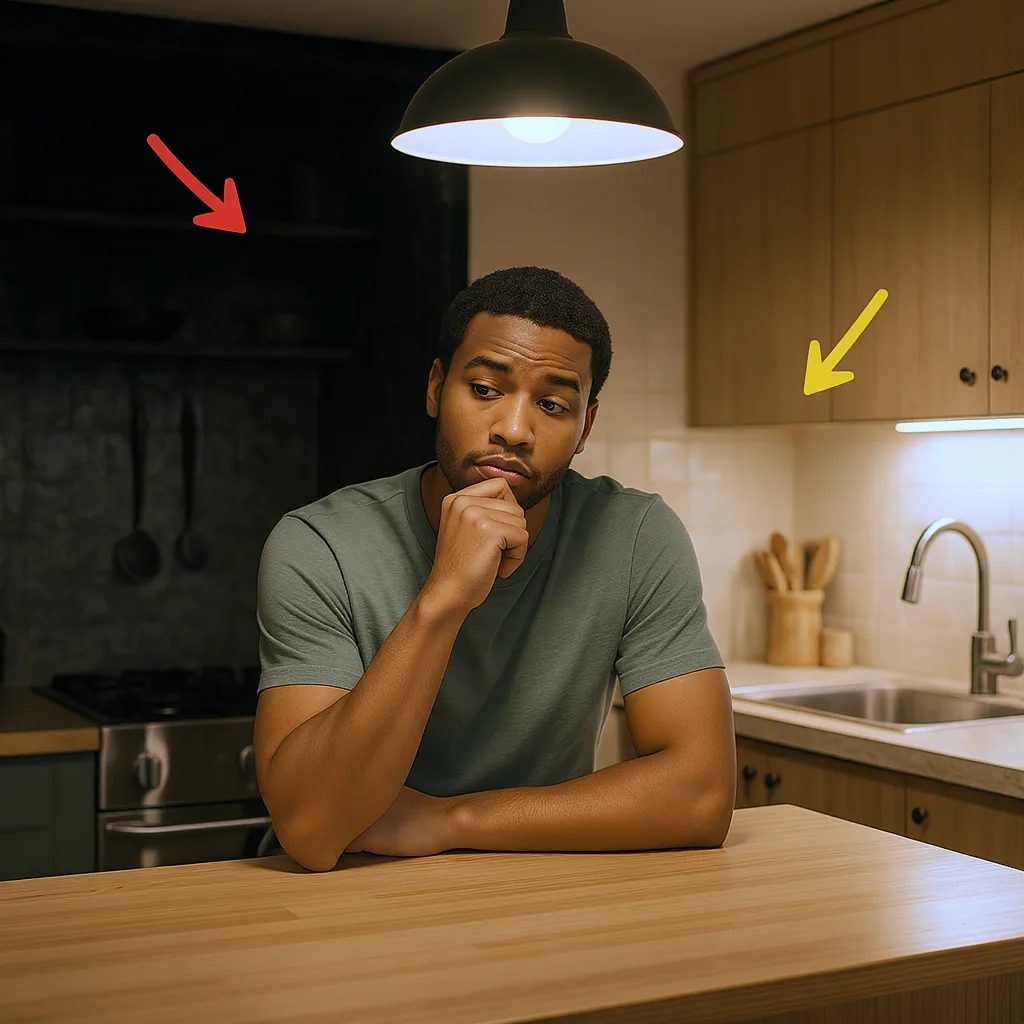
Start by identifying your key work zones: Where do you chop vegetables? Is your sink area well-lit for washing dishes? Does your island serve as a prep station, a dining spot, or both? Note where shadows fall from your body or upper cabinets. Next, audit your existing fixtures. What do you currently have, and what does each one actually do? Is your only source a single, glaring overhead dome light? Finally, consider your kitchen’s finishes. Dark cabinets and countertops absorb light, requiring more output, while light, glossy surfaces reflect it and can cause glare. This assessment isn’t a technical audit; it’s about understanding the lived experience of your kitchen’s light so your upgrades are perfectly targeted.
Do’s and Don’ts of a Smart Lighting Refresh
With your assessment done, you’re ready to make smart choices. This list of practical do’s and don’ts will help you avoid common pitfalls and ensure your new layers work in harmony.
DO: Unify Your Color Temperature. Stick to one color temperature (measured in Kelvins, or K) across all your new layers. For kitchens, 2700K-3000K (warm white) is inviting, while 3000K-3500K (neutral white) feels crisp and modern. Mixing cool and warm lights in one sightline creates visual chaos.
DON’T: Rely on a Single Bulb Type. That one bright overhead light is the root of all shadow problems. It can’t effectively serve as both ambient and task lighting. The core principle of how to layer kitchen lights is using different fixtures for different jobs.
DO: Layer Dimmers. Dimmer switches are the single most impactful upgrade for ambient and often task lighting. They allow you to adjust the mood from bright for cleaning to soft for evening entertaining, extending bulb life and saving energy.
DON’T: Create Glare. Avoid placing bare bulbs or bright LEDs in your direct line of sight. Ensure pendants are hung at an appropriate height (typically 30-36 inches above an island surface) and that under-cabinet lights have a diffuser or are positioned to shine directly on the counter, not your eyes.
DO: Prioritize LED Technology. For under-cabinet, accent, and most new fixtures, choose LED. They are cool-running, energy-efficient, long-lasting, and available in a wide range of color temperatures and styles. They make a refresh kitchen lighting plan both sustainable and practical.
DON’T: Forget the Finishes. While less critical than light quality, consider matching or complementing the finish of your new fixtures (brushed nickel, matte black, brass) with your existing hardware and faucet for a cohesive look.
Putting It All Together: A Simple Action Plan
You have the knowledge and the guidelines. Now, let’s build a logical, phased action plan. You don’t have to do everything at once. Start with the layer that will give you the biggest immediate improvement in daily life.
Phase 1: Conquer Task Lighting (The Quickest Win)
This is almost always the best place to start. Installing under-cabinet lighting transforms your countertops from shadowy zones into functional workspaces. Choose from plug-in LED tape lights, hardwired linear strips, or even battery-operated options for renters. This one change alone can revolutionize your modern kitchen lighting layers. Next, assess your island or sink. Could a plug-in pendant or a new hardwired fixture provide better task light there?
Phase 2: Upgrade Ambient Control & Output
Now, look up. Can you add a dimmer switch to your existing overhead light? It’s a relatively simple upgrade with huge impact. If your ambient light is insufficient, consider swapping a single bulb fixture for a multi-light ceiling fan with an integrated light kit or adding a plug-in swag lamp in a dark corner. The goal is to make your general light adaptable.
Phase 3: Introduce Accent & Personality
With function mastered, add the flourish. Install battery-operated LED pucks inside a display cabinet. Add low-profile, plug-in tape lights to the top of your cabinets for a soft uplight effect. Install automatic toe-kick lights for a nightlight and a sleek look. These are the finishing touches that elevate your kitchen’s design. For inspiration on fixture styles and placement, browsing a retailer like Lumens can provide visual ideas.
Remember, this order is flexible. Your assessment might reveal that a dark corner needs ambient light first, or that your island is the social hub deserving of a beautiful pendant. The plan is a guide, not a rigid protocol.
Your Brighter Kitchen Awaits
The path to a beautifully lit kitchen is clearer now. It doesn’t demand a full remodel, just a thoughtful approach to layering light. By moving past the myth of complexity and focusing on strategic, accessible upgrades, you hold the power to transform both the function and feel of your most-used room. Start tonight by simply observing where the light works and where it fails you. Then, take that first, decisive step—order that under-cabinet light tape or pick out a dimmer switch. View this not as a single project, but as an ongoing journey of improvement where each new layer adds comfort, clarity, and character to your home.
To recap, a successful kitchen lighting refresh hinges on understanding and implementing three layers:
- Ambient, Task, and Accent Lighting each serve a unique purpose—general illumination, focused work light, and decorative highlight.
- A refresh is achievable without major wiring; use plug-in, adhesive, and battery-operated solutions to work with your existing setup.
- Always assess your kitchen’s specific zones and pain points before buying anything.
- Key do’s include unifying color temperature, adding dimmers, and choosing LEDs. Key don’ts involve creating glare or relying on a single light source.
- Execute in phases: tackle task lighting first for immediate impact, then upgrade ambient control, and finally add accent elements for personality.