You push open the door after a long day, and the kitchen greets you with a stark, fluorescent hum. The single overhead fixture casts sharp shadows across the counter, making the space feel more like a laboratory than the heart of your home. This is the exact moment a kitchen lighting decor refresh begins—not with a sledgehammer, but with a simple shift in perspective. Transforming that clinical feel into a warm, inviting glow is less about a full renovation and more about mastering a layered, intentional approach. It starts with understanding light as your primary tool and builds into a routine of integrating visual warmth through materials and color. This systematic process turns your kitchen from a place you simply use into a space you genuinely love to be in.
A kitchen lighting and decor refresh is about layering different light sources—ambient, task, and accent—and integrating visual warmth through materials, color, and texture, not just swapping a single fixture. Refresh your kitchen’s feel by first assessing and layering your lighting, then adding visual warmth through wood, textiles, and reflective surfaces. It’s a systematic approach, not a single purchase, that builds a cohesive and cozy atmosphere.
The Lighting Toolkit: Your Foundation for Change
Think of your kitchen lighting design refresh not as a single task, but as assembling a set of specialized tools. Just as you wouldn’t use only a paring knife to prepare a full meal, you shouldn’t rely on a single light source to illuminate a complex, multi-functional space. The professional approach is to layer three distinct types of lighting: ambient, task, and accent. Each serves a unique purpose, and together, they create a balanced, functional, and inviting atmosphere.

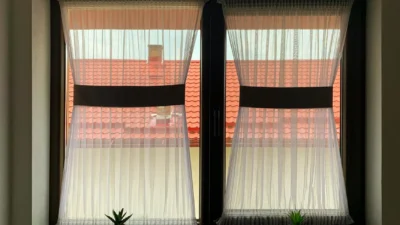
Photo by Ansar Muhammad on Pexels
Ambient Lighting: The Overall Glow
This is your base layer—the general illumination that replaces sunlight and allows you to move around the room safely. It’s often provided by ceiling-mounted fixtures like recessed lights, flush mounts, or a central chandelier. The goal is even, shadow-free light that fills the space without glare.
Task Lighting: The Functional Focus
As the name implies, this layer is all about function. It provides concentrated, bright light exactly where you perform specific activities: chopping vegetables at the counter, reading a recipe, or washing dishes at the sink. Under-cabinet lighting and well-placed pendants are classic examples. This is where many kitchen lighting update ideas can have the most dramatic impact on daily usability.
Accent Lighting: The Atmosphere Artist
This is the secret weapon for visual warmth and depth. Accent lighting is decorative and directional, used to highlight architectural features, artwork, or open shelving. Think of LED strips inside glass-front cabinets, subtle puck lights above upper cabinets, or a small plug-in sconce. It adds drama, dimension, and that coveted cozy feel after the sun goes down.
Diagnosing Your Kitchen’s Current Light (and Why It Feels Cold)
Before you buy a single bulb, spend an evening observing your kitchen. The goal is to identify why it feels sterile or uninviting. Often, the issue isn’t a lack of light, but the quality and distribution of it. A single, harsh overhead fixture, for example, creates unflattering shadows under your eyes and cabinets, making the space feel more like an interrogation room than a heart-of-the-home.
Common culprits include relying solely on a central ceiling light, using bulbs with a cool, blue-white color temperature (often 4000K or higher), and having no ability to dim the lights. Shadows over key work areas are a dead giveaway that task lighting is missing. This diagnostic phase is critical—it turns a vague desire for a cozy kitchen decor refresh into a targeted plan.
Quick Self-Assessment Checklist
- The Single-Source Test: Turn off all lights except your main overhead. Can you safely chop an onion at the counter?
- The Shadow Check: Do deep shadows fall across your primary prep areas and sink?
- The Color Temperature: Is the light bright white or slightly blue, making whites look clinical? (Check the bulb packaging for its Kelvin rating.)
- The Dimmer Dilemma: Do you have any dimmer switches, or are your lights stuck at one blinding intensity?
- The Glare Factor: Do you see the direct reflection of bare bulbs when you look up or across the room?
Building Your Ambient Light Layer: The Overhead Glow
Your ambient layer sets the entire mood. The most common upgrade here is moving from one central fixture to multiple, strategically placed sources. Recessed can lights, spaced evenly across the ceiling, provide the most uniform wash of light. If installing new cans isn’t feasible, consider supplementing with a larger flush-mount fixture or multiple semi-flush mounts.
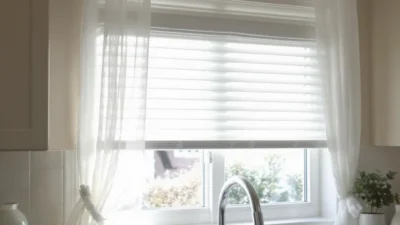
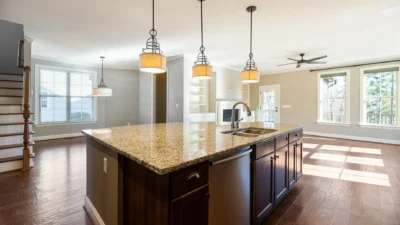
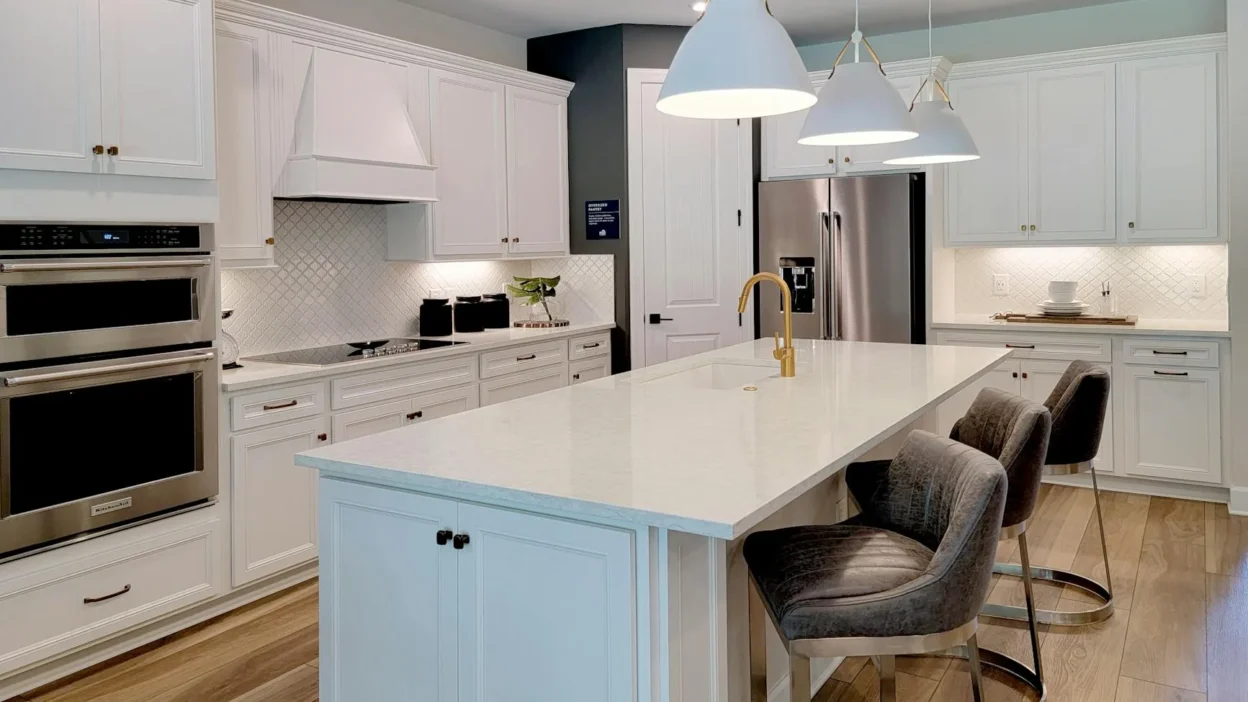
For kitchens with islands or peninsulas, pendant lights do double duty: they contribute to ambient light while also providing crucial task lighting below. The key is to ensure the light is diffused—through shades or frosted glass—to prevent harsh glare.
The Non-Negotiables: Dimmers and Color Temperature
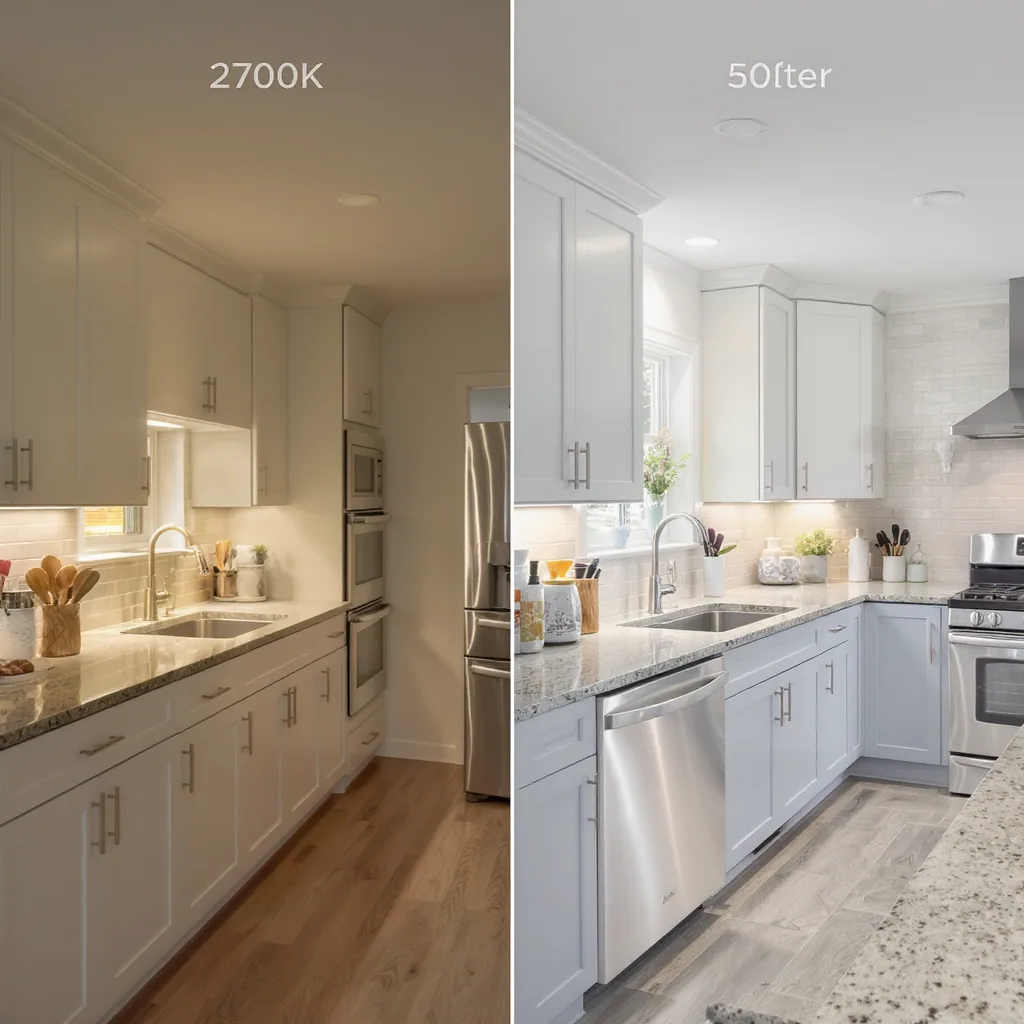
No discussion of warm kitchen lighting is complete without addressing these two pillars. First, install dimmer switches on every ambient circuit. This single change gives you ultimate control, allowing you to shift from bright, functional light for cleaning to a soft, dinner-party glow. Second, choose your bulbs’ color temperature wisely. Measured in Kelvins (K), lower numbers mean warmer, more golden light. For a cozy kitchen, aim for bulbs in the 2700K to 3000K range. This warm white light mimics incandescent bulbs and makes wood tones, paint colors, and food look their best, directly contributing to a cozy kitchen lighting atmosphere.
Strategic Task Lighting: Where You Actually Work
This is where your kitchen lighting update ideas get practical. Effective task lighting eliminates shadows and reduces eye strain, making kitchen chores safer and more pleasant. The rule is simple: light should come from in front of you, not behind, to prevent you from working in your own shadow.
Do’s and Don’ts for Key Areas
Under-Cabinet Lighting:
- DO install continuous LED tape lights for the most even, shadow-free illumination across your entire countertop. They’re low-profile and often dimmable.
- DON’T rely on under-cabinet fixtures that are too far apart, creating pools of light with dark spots in between.
- DO place the lights at the front edge of the cabinet to best light the counter, not the backsplash.
Over the Sink & Island:
- DO use a pendant or linear fixture over the sink if you have no window. Ensure it’s rated for damp locations.
- DON’T hang island pendants so low they obstruct sightlines or hit people in the head; typically 30-36 inches above the counter is safe.
- DO consider the beam angle. A wider beam from a frosted globe provides general task light, while a directional shade focuses light down onto the surface.
Accent & Atmosphere: The Secret to Cozy
If ambient light is the canvas and task lighting is the detailed brushwork, accent lighting is the signature that makes the piece uniquely yours. This layer is purely about emotion and aesthetics, and it’s the fastest route to a profound cozy kitchen decor refresh. It works by creating points of visual interest and depth, drawing the eye around the room and making it feel larger and more dynamic.
Consider adding LED tape light inside glass-front cabinets to showcase your favorite dishes. Install simple, low-wattage puck lights on top of your upper cabinets; the light will bounce off the ceiling, creating a soft, welcoming glow that makes the cabinets appear to float. Toe-kick lighting under base cabinets adds a surprising and luxurious touch, gently illuminating the floor at night. Even a single, beautiful plug-in wall sconce with a warm bulb can act as a decorative focal point and provide a perfect pool of light for a coffee nook.
Beyond Bulbs: The Visual Warmth Routine
Lighting provides the illumination, but visual warmth is created by what the light touches. This is the “routine”—the daily practice of curating materials and objects that interact beautifully with your layered light. It’s about moving from a technical lighting plan to a lived-in, sensory experience. Think of it as styling your kitchen to be a better partner to your new lights.
This philosophy shifts your focus from fixtures alone to the entire sensory landscape: how light plays across a textured wood grain, gleams off a polished stone, or softens as it filters through a linen curtain. A successful kitchen decor lighting update seamlessly blends the technical with the tactile.
Imagine finishing your lighting install and feeling something is still missing. You place a large, worn wooden bowl filled with lemons on the island. Under your new warm-toned pendants, the wood’s rich grain seems to deepen, and the lemons glow. You add a simple, neutral woven rug by the sink. Suddenly, the light feels grounded, absorbed, and reflected in a way that makes the whole room feel intentionally curated and inviting. This is the routine in action.
Material Magic: Wood, Stone, and Textile Textures
Materials are the primary conductors of visual warmth. They determine whether light is reflected harshly, absorbed moodily, or diffused softly. Start by introducing natural, tactile elements that have inherent warmth.
Wood is your greatest ally. A cutting board left on the counter, a set of olive wood utensils in a crock, or open wood shelving instantly adds organic warmth. Stone, like marble or honed granite, offers a cool counterpoint but reflects light in a soft, luxurious way when paired with warm bulbs. Never underestimate the power of textiles. Linen or cotton dish towels, a window valance, or seat cushions on bar stools add a layer of softness that absorbs sound and light, preventing a sterile, echoey feel. Woven baskets for produce or storage introduce another layer of texture and a handcrafted vibe.
Color & Reflection: The Finishing Touches
Color is light made visible. Your choice of paint, accessories, and finishes dictates how your layered lighting will feel. Warm, light-reflecting colors amplify your efforts, while some modern trends can work against them if not balanced carefully.
Do’s and Don’ts for Color and Finish
Do:
- Choose warm, neutral paint colors for walls or cabinets if you’re updating. Think creamy whites, soft beiges, gentle sage greens, or earthy terracottas. These colors reflect warm light beautifully.
- Incorporate metallic finishes like unlacquered brass, copper, or oil-rubbed bronze on faucets, cabinet hardware, or light fixtures. These act as tiny mirrors, catching and bouncing points of warm light around the room.
- Consider a mirrored or high-gloss tile backsplash in a warm tone to dramatically amplify light in a small or dark kitchen.
Don’t:
- Pair your new warm lighting with a stark, cool gray or pure white paint without balancing it with ample wood and textile warmth; it can create a dissonant, cold feel.
- Mix too many metal finishes without a conscious plan. Stick to two, perhaps one dominant and one as an accent, to maintain cohesion.
- Overlook the ceiling. A flat white ceiling is a perfect reflector for ambient light. Painting it a dark color will absorb that light and make the room feel lower.
Common Lighting & Warmth Mistakes to Sidestep
Even with the best intentions, it’s easy to undermine your refresh. Awareness of these common pitfalls will save you time, money, and frustration.
- Mistake 1: The Cool-White Bulb Blunder. Installing bright white or daylight bulbs (5000K+) is the single fastest way to kill cozy ambiance. They render colors harshly and feel clinical.
- Mistake 2: Ignoring Dimmers. Overhead lights stuck on “high” offer no flexibility for mood. Dimmers are inexpensive and transformative.
- Mistake 3: Over-lighting the Space. More lumens are not always better. An overly bright room can feel stark. Use layers to build light where you need it, not everywhere at maximum intensity.
- Mistake 4: Visual Clutter that Blocks Light. Overcrowded countertops and windowsills create visual noise and block light from reflecting off surfaces. Edit your decor to allow light to travel.
- Mistake 5: Inconsistent Metal Finishes. A chrome faucet, brass hardware, and a black light fixture can make a space feel disjointed. Aim for harmony in your metal tones.
Your 10-Step Refresh Roadmap
Now, let’s consolidate everything into a clear, actionable plan. Follow these steps in order to systematically transform your kitchen’s feel from functional to fantastically inviting.
- Conduct an Evening Audit. With all lights on, note shadows, dark corners, and the overall color feel. Identify your single biggest pain point.
- Master Your Switches. Install dimmer switches on all main overhead lighting circuits. This is a high-impact, low-cost first win.
- Swap Every Bulb. Replace all existing bulbs with warm white versions (2700K-3000K). Notice the immediate shift in atmosphere.
- Address Task Lighting Gaps. Prioritize under-cabinet lighting. Install LED tape lights or plug-in strips for immediate countertop illumination.
- Evaluate Overhead Ambient Light. Can you add a fixture, replace a single one with multiple, or adjust pendant placement for better coverage?
- Introduce One Accent Source. Start simple: add plug-in cabinet lighting or a plug-in sconce. Observe how it adds depth.
- Edit and Declutter Surfaces. Clear countertops of non-essentials. Allow key materials (wood, stone) to be visible and interact with light.
- Layer in Two Textural Elements. Add a wooden bowl, a woven basket, linen towels, or a textured rug. Feel the room soften.
- Consider a Color Accent. If walls are cool, introduce warmth through art, a vase, or small appliances in a warm hue.
- Test and Tweak at Dusk. As natural light fades, adjust your dimmers and turn on your layers one by one. Find your perfect “evening mode” setting.

Crafting Your Kitchen’s Evening Glow
The journey to a warmer, more inviting kitchen isn’t about finding one perfect light fixture or the trendiest paint color. It’s a deliberate practice of layering—both light and life. You start with the toolkit, mastering the technical dance of ambient, task, and accent light. Then, you build the routine, curating the materials and moments that give that light meaning and warmth.
The tradeoff is clear: this approach asks for more thoughtful planning than a simple weekend swap. It requires you to see your kitchen not just as a workspace, but as a dynamic environment that changes with the time of day and your needs within it. In return, you gain a space that doesn’t just function better but feels profoundly better—a true heart of the home that welcomes you in with a gentle glow, day after day.
A successful kitchen lighting and decor refresh hinges on a layered approach. First, address the foundation by assessing and upgrading your lighting in three tiers: ambient (overall glow), task (focused work light), and accent (mood-enhancing detail). Crucially, install dimmers and choose warm white bulbs (2700K-3000K). Then, build visual warmth by introducing natural textures like wood and linen, choosing warm paint tones, and using reflective metals to bounce light. Avoid common mistakes like cool-toned bulbs and clutter. Start small—swap your bulbs and add one textural element—and build from there.
Q: Can I make my kitchen warmer without changing light fixtures?
A: Absolutely. Start by swapping all bulbs for warm white (2700K-3000K) and installing dimmer switches. Then, add visual warmth through decor: wooden cutting boards, woven baskets, linen textiles, and warm-toned accessories like terracotta pots or brass canisters. These elements interact with your existing light to create a cozier feel.
Q: What is the ideal color temperature (Kelvin) for warm kitchen lighting?
A: For a cozy, inviting atmosphere, aim for a color temperature between 2700 Kelvin and 3000 Kelvin. This range produces a warm white light that is flattering, reduces harsh shadows, and makes wood tones and food look more appealing. Avoid “daylight” or “cool white” bulbs (4000K+), which can feel sterile.
Q: Are under-cabinet LED strips difficult to install?
A: Many modern LED strip kits are designed for DIY installation. They often come with adhesive backing and plug into a standard outlet, requiring no hardwiring. For a cleaner look with hidden wires, you may need to drill a small hole inside a cabinet. Hardwired versions offer a permanent solution but typically require an electrician.
Q: