When planning a kitchen lighting refresh, the biggest mistake isn’t the fixture you choose—it’s the lighting layer you ignore for your specific layout. Generic advice often leads to a beautiful but dysfunctional space, with shadows in your sink or a dining area that feels like a spotlighted stage. The true best way to refresh kitchen lighting by layout is to start with a simple diagnosis of your kitchen’s shape and workflow, then build a layered plan that serves its unique architecture. Whether you’re wrestling with a narrow galley, an L-shaped corner, or a sprawling open plan, the right strategy transforms not just the light, but how you cook, gather, and live in the heart of your home.
The best way to refresh kitchen lighting by layout is to first identify your kitchen’s shape—galley, L-shaped, or open plan—and then layer task, ambient, and accent lighting accordingly. For galley kitchens, focus on intense, linear task lighting down the central aisle. L-shaped layouts need balanced illumination in both legs and the corner. Open plan kitchens require defining zones with distinct lighting scenes to separate cooking, dining, and living areas.
Start Here: What’s Your Kitchen’s True Layout?
Before you buy a single bulb, you need an honest diagnosis. The shape of your kitchen dictates how light travels and where shadows fall. Generic advice fails here. So, let’s identify your layout. Look beyond just the footprint—consider how you move through the space.

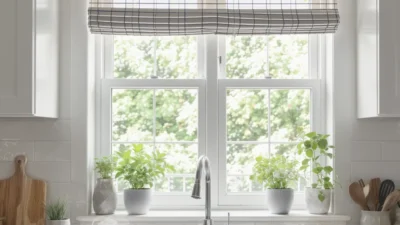
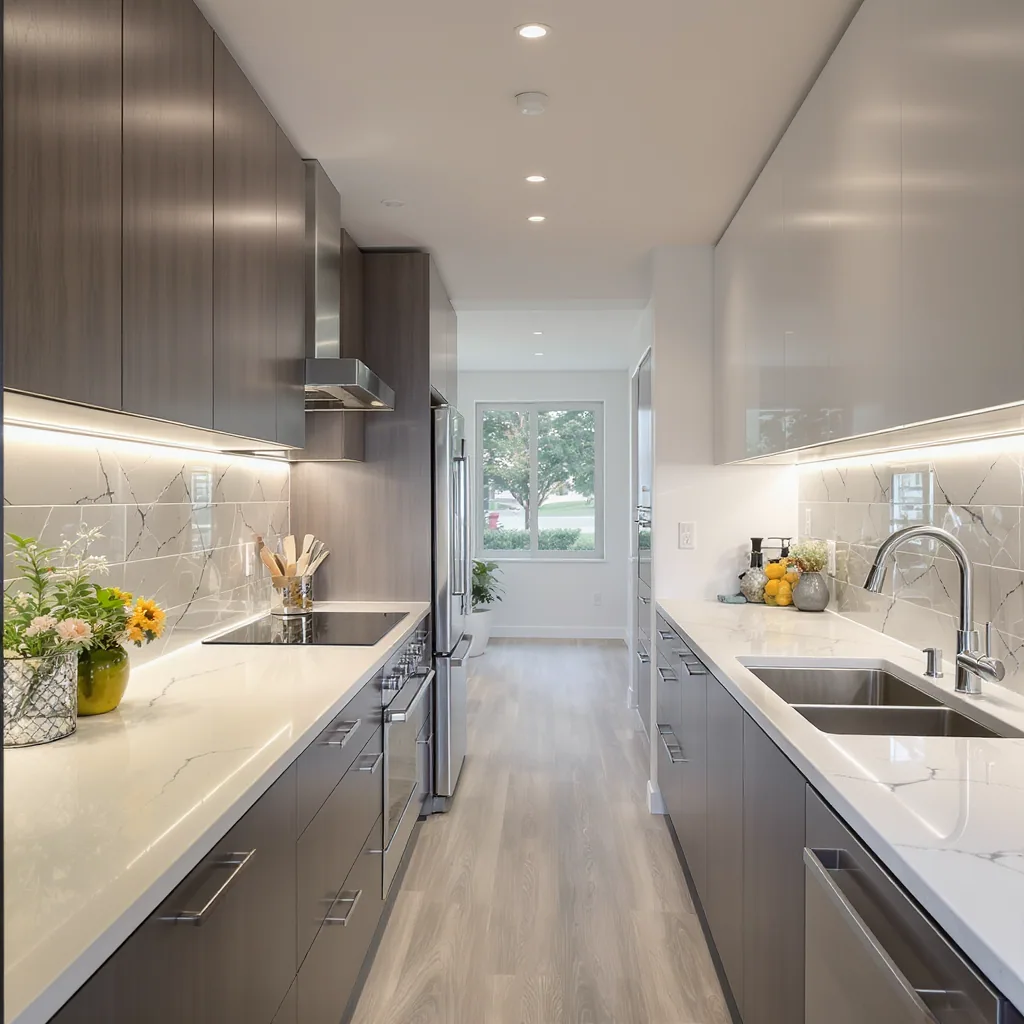
Galley: Two parallel walls of cabinets/appliances with a single walkway in between. It’s a corridor built for efficiency. The core challenge is lighting a narrow, deep space without creating a shadowy tunnel.
L-Shaped: Cabinets and counters run along two perpendicular walls, forming a distinct corner. This layout creates two separate “legs” of workspace that need balanced light, plus that often-forgotten corner.
Open Plan: The kitchen flows into a dining or living area without full walls. The lighting challenge isn’t just about tasks; it’s about using light to define separate zones within one large, shared space.
Your kitchen layout lighting guide starts with this simple choice. Pick the one that fits, and the right strategy follows.
Galley Kitchen Lighting: The Linear Efficiency Play
The goal for a galley is simple: banish shadows from your primary work aisle. Because the space is long and narrow, your lighting must be intense and linear, following the path of the countertops.
The single most effective galley kitchen lighting idea is to install continuous LED tape lighting under all upper cabinets. This throws light directly onto the countertop, eliminating the shadow your body casts when you stand at the counter. It’s a non-negotiable task layer.
The Do’s and Don’ts for Galley Lights
Do: Use a central row of recessed downlights or a sleek linear ceiling fixture aligned with the center of the aisle. This provides general ambient light that fills the corridor. Do consider adding a subtle wall-washing light (like a slim wall sconce or upward-facing LED) at the far end to make the wall recede, creating an illusion of width.
Don’t: Hang a single, large pendant light in the middle. It will create a bright spot with dark pools at either end. Don’t rely solely on one central ceiling fixture; without under-cabinet light, your workspace will be in your own shadow.
Your lighting for galley kitchens should feel like a bright, even runway. Every inch of that central aisle needs to be illuminated for both safety and function.
L-Shaped Kitchen Lighting: Balancing the Corner
An L-shaped layout’s lighting pitfall is an under-lit corner. You might have great light over the sink on one leg and over the stove on the other, but the corner where they meet becomes a dark void for prep work. Your L-shaped kitchen lighting plan must address this.
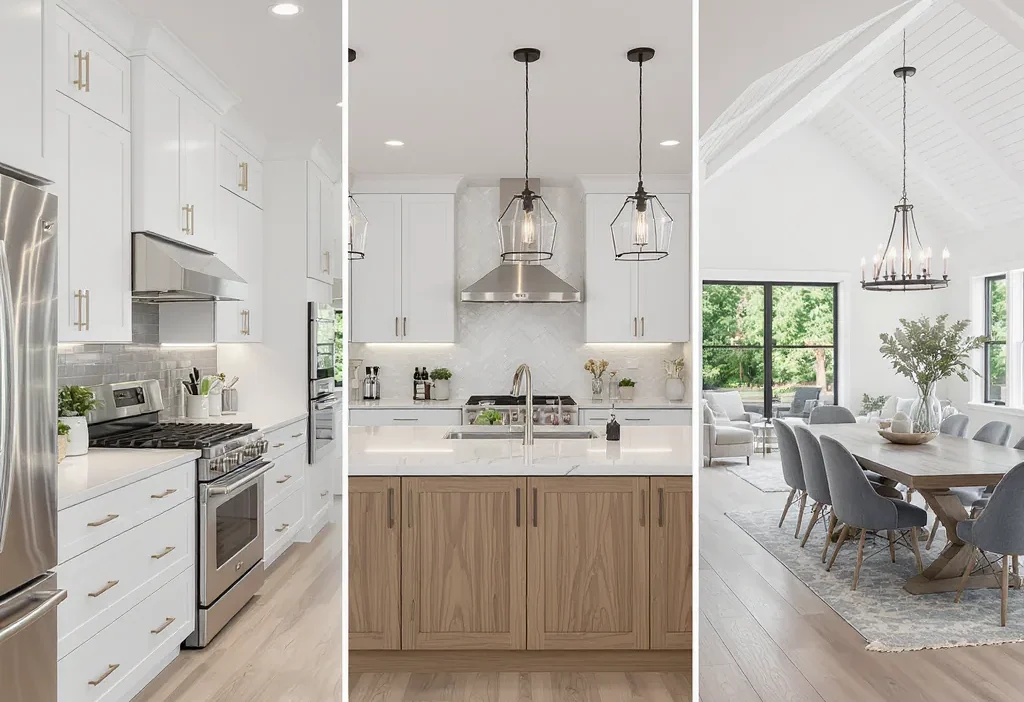
Do treat each leg as its own zone. This often means under-cabinet lighting on both runs of cabinets. Then, provide overall ambient light, ideally with multiple recessed lights or a ceiling fixture placed to cover both areas, not just the room’s geometric center.
Do light the corner independently. This is the key move. If you have upper cabinets, under-cabinet lighting here is essential. If it’s an open corner, consider a small, directional pendant or a mini-pendant to dedicate light to that spot. A plug-in swing-arm wall lamp can also be a clever, low-commitment solution.
Don’t rely on a single central fixture. A lone light in the middle of the “L” will leave the ends of each leg and the corner in relative darkness. The spread of light won’t match the spread of your cabinetry.
By balancing illumination across both legs and specifically targeting the corner, you create a cohesive, uniformly bright workspace that matches the kitchen’s shape.
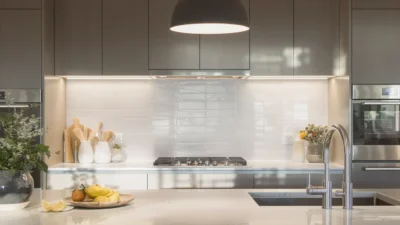
Open Plan Kitchen Lighting: Zoning with Light
In an open concept space, the lighting needs to do the job that walls no longer do: define areas. A single, overwhelming bank of bright ceiling lights makes the whole room feel like a cafeteria. A successful open plan kitchen lighting refresh is about creating distinct, controllable scenes.
Think in terms of zones: Kitchen Zone, Dining Zone, and Living Zone. Each needs a different type and intensity of light, controlled separately.
Creating Your Lighting Zones
Kitchen Zone: Stick to the principles of layered task lighting (under-cabinet, over-island pendants, recessed lights over key areas). This zone needs to be the brightest for safety and precision.
Dining Zone: This is for atmosphere. A statement pendant or a linear chandelier over the table creates a visual anchor and provides focused, intimate light for meals. Always put it on a dimmer.
Living Zone: Use softer, ambient light here—floor lamps, wall sconces, or a central fixture on a very low dimmer setting. This encourages relaxation and subtly tells the eye, “this is a different area.”
The magic tool for your open concept kitchen lighting layers is the dimmer switch. Having separate dimmers for the kitchen overheads, the dining pendant, and the living area lights allows you to set the perfect mood for any time of day, transforming the entire space from a bright workspace to a cozy evening hub.
Your Quick-Refresh Action Plan (For Any Layout)
You don’t need a full rewire to make a major impact. Based on your layout diagnosis, choose one of these immediate, high-impact projects to start your kitchen lighting refresh by layout today.
If you have a Galley Kitchen: Your quick win is adding LED tape light under your upper cabinets. It’s a DIY-friendly project that instantly upgrades your task lighting for kitchen layouts more than any new ceiling fixture could. It directly solves the shadow problem.
If you have an L-Shaped Kitchen: Focus on the corner. Add a plug-in, plug-in under-cabinet light strip specifically for the corner cabinets, or install a plug-in wall lamp with a swing arm to shine light right where you need it. This single act balances the entire workspace.
If you have an Open Plan Kitchen: Install dimmer switches. Start with the main kitchen overhead lights and your dining pendant. This simple upgrade gives you immediate control to soften the space and define zones through light intensity, which is the core of a successful refresh kitchen lights by shape.
Pick the action that matches your kitchen’s architecture. One focused change based on your layout will yield better results than three random “pretty” fixtures.
Lighting That Fits the Frame
The best lighting plan is a negotiation. It balances the aesthetic you desire with the functional demands of your kitchen’s unique architecture. A beautiful pendant can feel all wrong if it leaves your galley kitchen in shadows, just as bright, clinical task lighting can ruin the ambiance of an open-plan living area.
By starting with the layout—diagnosing whether you’re working with a corridor, an L, or an open canvas—you make choices that serve the space first. This layout-first approach ensures your kitchen isn’t just lit, but illuminated intelligently, becoming both brilliantly usable and authentically beautiful. It all starts with that first, honest look at your kitchen’s true shape.