Does your kitchen feel more like a sterile lab or a gloomy cave when you’re trying to cook? You’re not alone. Most kitchen lighting woes boil down to a mismatch between the light we have and the light we need for the complex tasks—and moods—of that space. The good news is you don’t need a full renovation or an electrician on speed dial to fix it. A functional kitchen lighting plan is a system, not a single bulb, and you can build yours by following a simple, three-part protocol. This kitchen lighting checklist cuts through the jargon and gives you a clear, actionable sequence to evaluate your current setup and make targeted improvements. We’ll focus on the three pillars that make or break the space: getting the bulb tone right for atmosphere, mapping your placement for function, and proactively controlling glare for comfort.
A functional kitchen lighting checklist focuses on three pillars: bulb tone (color temperature), strategic placement for task and ambient light, and proactive glare control. Get these right, and you’ll transform both the functionality and feel of your space. Specifically, aim for a warm white bulb color temperature (2700K-3000K), ensure light is layered over task zones, the general area, and accents, and use diffusers, dimmers, and directional fixtures to eliminate harsh reflections.
Protocol Step 1: Check Your Bulb Tone (Color Temperature)
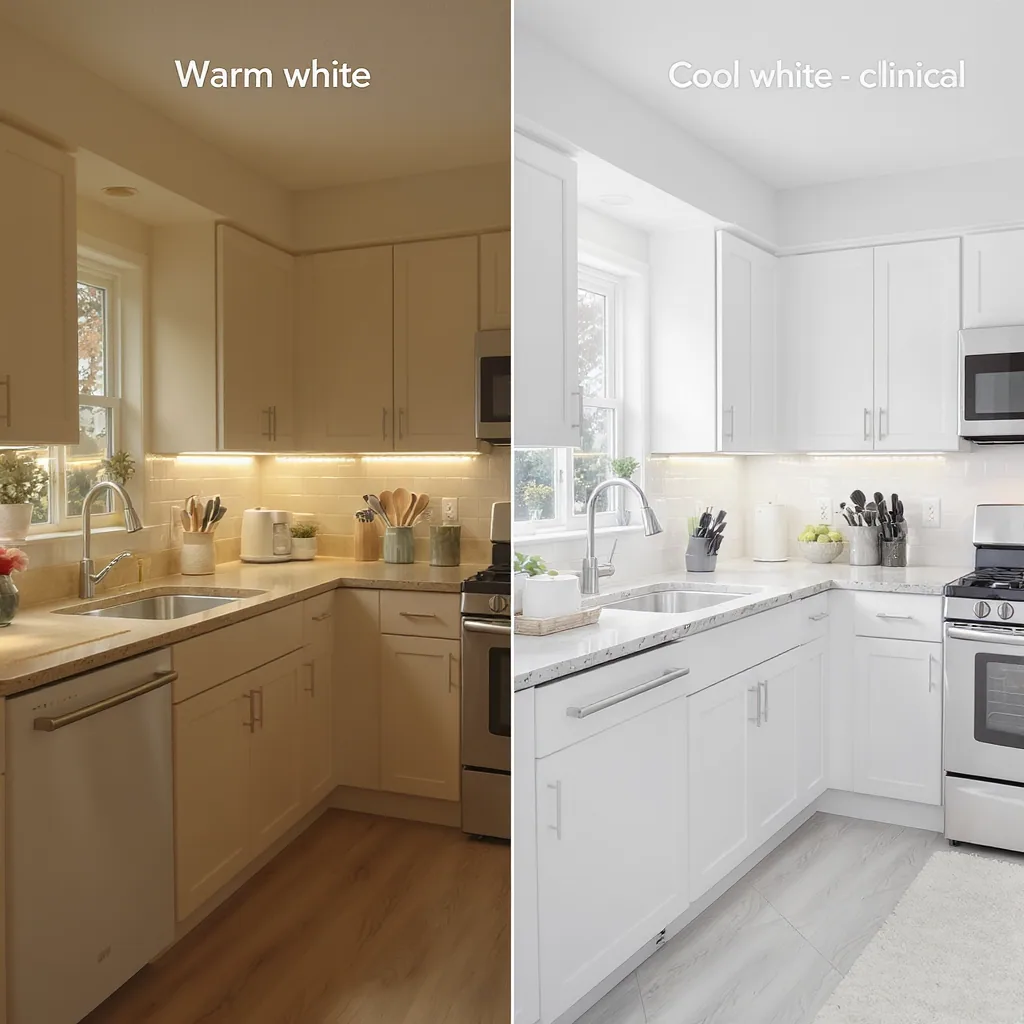
This is the single most impactful change you can make, and it’s often the easiest. Bulb tone, measured in Kelvin (K), describes how warm or cool the light appears. A lower number (like 2700K) gives off a warm, yellowish glow similar to an incandescent bulb. A higher number (like 5000K) emits a cool, bluish light that feels more like a hospital or a sterile office.
For a kitchen, you want a tone that makes food look appetizing and the space feel inviting, not clinical. The sweet spot is typically between 2700K and 3000K. This kitchen bulb color temperature provides enough crispness to see what you’re chopping while keeping the atmosphere cozy. Cool white bulbs (3500K+) can make your kitchen feel harsh and can even make food look unappealing.
Here’s your mini-checklist for this step:
- Look at your bulb packaging: Find the “K” number on any bulbs you currently have. Are they 5000K “daylight” bulbs? That’s likely your problem.
- Swap cool white for warm white: For your main fixtures, purchase bulbs labeled “warm white” or “soft white” (2700K-3000K).
- Test before you buy a whole set: If you’re unsure, buy one bulb first and see how it looks in your space at night when you’ll be using it most.
Protocol Step 2: Map Your Light Placement (The Layer System)
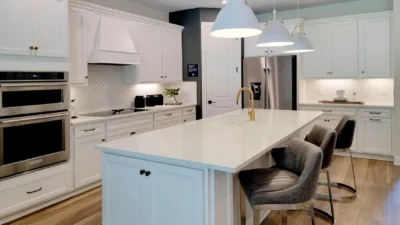
Good kitchen lighting isn’t about one super-bright ceiling light. It’s about layering different types of light to cover all your needs. Think of it in three layers: Task, Ambient, and Accent. Your kitchen lighting plan should address each one.

Photo by Aksonsat Uanthoeng on Pexels
Grab a mental (or actual) map of your kitchen and run through this zoning exercise:
- Task Lighting (The “Can I See?” Layer): This is direct, shadow-free light for specific work.
- Is there a dedicated light over the sink?
- Do you have under-cabinet lighting or pendants shining directly on the countertops where you chop and prep?
- Is the stovetop well-lit?
- Ambient Lighting (The “Overall Glow” Layer): This provides general illumination for moving around safely.
- Do your ceiling fixtures (like recessed lights or a central fixture) evenly light the room without dark corners?
- Can you turn this layer on independently of the task lights?
- Accent Lighting (The “Feel Good” Layer): This adds depth and highlights features.
- Could you add small lights inside glass-front cabinets?
- Is there a way to graze light across a beautiful backsplash or architectural detail?
You don’t need all three layers to be elaborate. The goal is to identify gaps—like a dark countertop—so you know where to add light next. For a deeper dive on electrical basics for DIY projects, resources like The Family Handyman’s guide to wiring can be helpful.
Protocol Step 3: Conduct a Glare Control Audit
You’ve got the right tone and good placement, but if you’re squinting or seeing bright reflections, you’ve got glare. This is where kitchen glare reduction comes in. Glare happens when a bright light source is directly in your line of sight or reflects off a shiny surface.
Here’s a common scenario: You’re chopping an onion at the counter. The under-cabinet LED strip is brilliant, but you catch its blinding reflection in your knife blade or the stainless-steel sink. That’s glare, and it’s fatiguing.
Walk through your kitchen and look for these culprits, then apply these immediate fixes:
- Bare Bulbs: Can you see the actual bulb from where you stand or sit? If yes, add a shade, diffuser, or frosted glass cover. Swap clear bulbs for frosted ones.
- Direct-Down Recessed Lights: These can create harsh pools of light and shadows. Consider adding “eyeball” trims that let you angle the light toward a wall, or use wider-beam bulbs to soften the effect.
- Shiny Surface Reflections: If under-cabinet lights glare off countertops, ensure they are mounted toward the front of the cabinet, shining back toward the wall, not out into the room. A simple dimmer switch is also a game-changer, allowing you to lower the intensity to a comfortable level.
Putting Your Checklist to Work: A Quick Walkthrough
This three-step protocol is designed to be tackled in order, but you don’t have to do it all in one weekend. Start small. Tonight, check the bulbs in your overhead fixture and swap them for 2700K warm white bulbs. That’s a win.
Next weekend, do the mapping exercise. Maybe you realize you need one simple plug-in under-cabinet light for your main prep area. Add it. The following week, notice if that new light causes glare and adjust its position or add the dimmer you’ve been meaning to install.
By breaking your kitchen lighting layout into these three manageable checks—Tone, Placement, Glare—you systematically solve the most common problems. Your action for today? Pick just one item from the lists above and do it. That’s how a functional, beautiful kitchen lighting scheme gets built.
Lighting as a System, Not a Single Bulb
Great kitchen lighting isn’t found in a single, perfect fixture. It’s the result of a simple system you can control. By consistently applying the three-check protocol—assessing bulb tone for warmth, mapping placement for full coverage, and auditing for harsh glare—you gain a framework that works for any kitchen, anytime. Remember, the goal is to create a space that feels as good as it functions, where you can see clearly and relax comfortably. You now have the checklist to make that happen.