You stand in your kitchen, coffee in hand, and your gaze inevitably lands on them: those honey-oak cabinet fronts from another era. The boxes are solid, the layout works, but the whole space feels stuck in a 90s time warp. The thought of a full, gut-to-the-studs kitchen remodel is enough to make your wallet weep and your stress levels spike. But what if there was a smarter, more affordable middle ground? This is the core dilemma for any homeowner considering a kitchen cabinet refresh guide. Your journey starts with a single, pivotal question: do you roll up your sleeves for a DIY cosmetic update, or do you invest in a professional refacing or repainting service for a more transformative result? This guide is designed to cut through the noise, laying out both paths clearly so you can make the most confident—and cost-effective—decision for your home and your sanity.
The best path for your kitchen cabinet refresh depends on your budget, skill level, and how much change you want. For a fast, low-cost facelift where your cabinet boxes are in good shape, a DIY cosmetic update with paint and new hardware can work wonders. If you desire a more durable, professional-looking transformation that can change the cabinet door style itself, investing in professional refacing or repainting is the smarter, longer-term choice.
The Two Paths to a New Kitchen Look
Your journey to a fresh kitchen starts with a single, crucial choice. Fundamentally, you have two distinct philosophies for your kitchen cabinet refresh guide: the DIY cosmetic update and the professional transformation. This isn’t just about cost; it’s about your goal. Are you looking for a quick, budget-friendly facelift, or are you aiming for a durable, style-altering makeover that feels like a new kitchen?
The right path filters down from that answer. One route puts you in the driver’s seat with paint brushes and a screwdriver, focusing on surface-level changes that deliver impressive visual bang for your buck. The other leverages expert skill and materials to replace cabinet fronts and finishes, offering a result that’s often indistinguishable from all-new cabinetry. Understanding this core dichotomy is the first step to a successful project you’ll love for years.
Path 1: The DIY Cosmetic Refresh (Budget & Speed)
This path is the champion of empowerment and accessibility. If your cabinet boxes are structurally sound but just look tired, a DIY cosmetic refresh can work absolute wonders. It revolves around three powerful levers: updating the finish, swapping the hardware, and adding strategic decor. This approach is for you if you enjoy hands-on projects, have a tight budget (typically under $1,000), and want to see a dramatic change in a weekend or two.
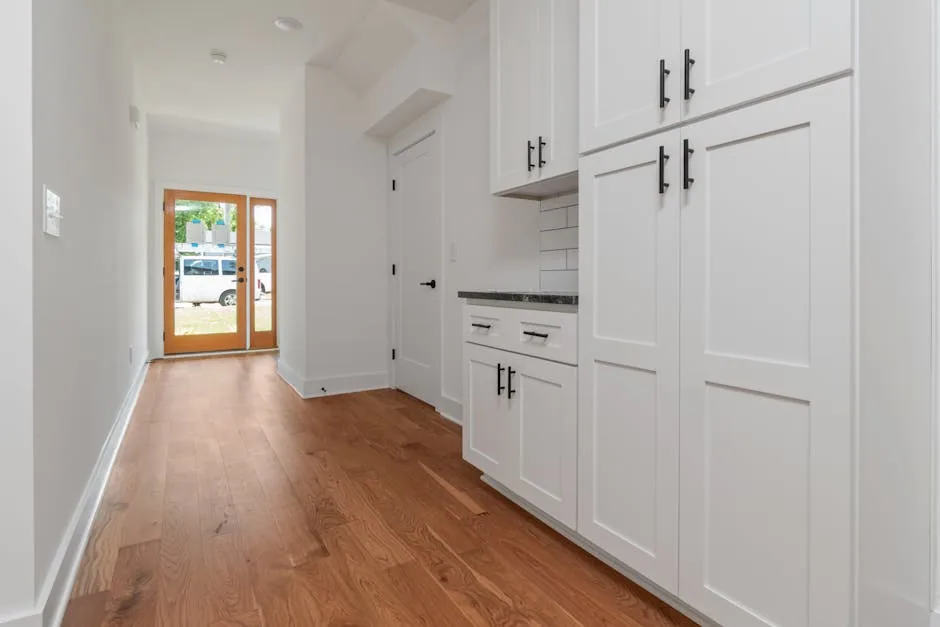
Photo by Curtis Adams on Pexels
Core Tactics for a DIY Win
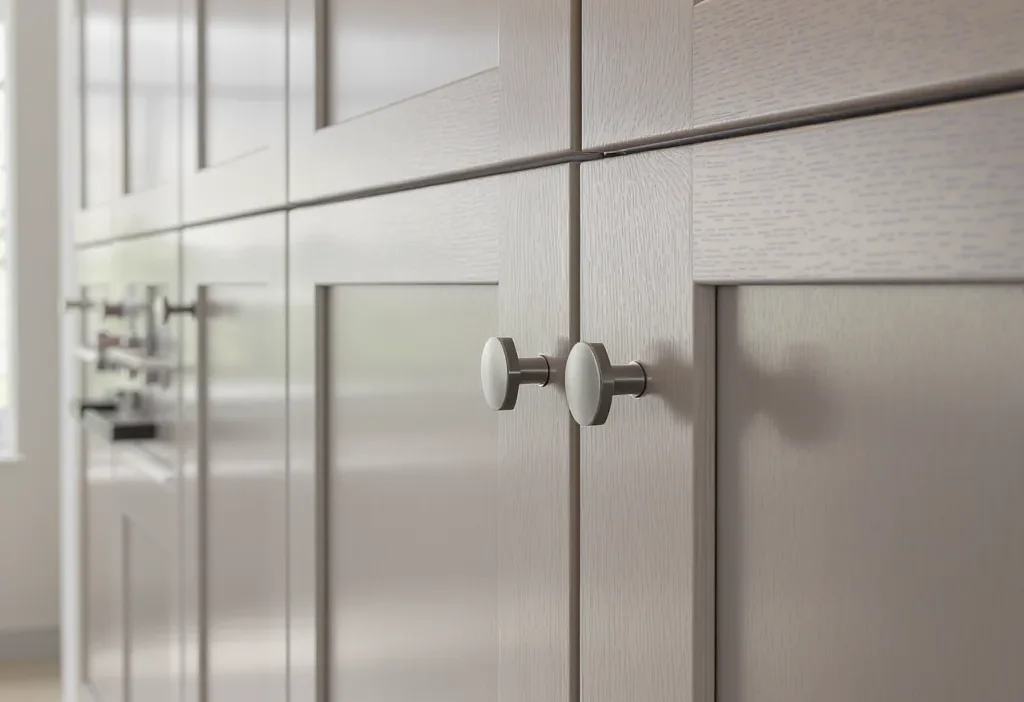
The heart of this path is a new cabinet finish. Painting is the most common method, transforming dark oak to crisp white or adding a bold, modern color. For a less intensive option, consider gel staining over existing wood tones. The second non-negotiable is new hardware. Swapping out dated knobs for sleek bar pulls or classic cup handles instantly modernizes the entire look. Finally, consider a kitchen cabinet decor refresh with added elements like crown molding, toe-kick trim, or a complementary peel-and-stick backsplash to frame your updated cabinets.
Success here is 90% preparation. This means thorough cleaning, degreasing, sanding, and using the right primer and paint formulated for cabinets. The reward is a highly personalized, cost-effective update that you can truly take pride in.
Path 2: Professional Refacing & Repainting (Durability & Transformation)
When your goal is a comprehensive, long-lasting transformation, professional services are the superior investment. This path isn’t just a better version of DIY; it’s a different process with a different outcome. Professionals offer two main services: refacing (replacing doors/drawer fronts and applying matching veneer to cabinet boxes) and professional repainting/spraying using commercial-grade equipment and finishes.
What You’re Really Paying For
The value lies in durability, finish quality, and style flexibility. A professional spray application results in a harder, more even coat that resists chips and wear far better than most brush-applied paints. More importantly, refacing allows you to completely change the style of your cabinets—converting raised-panel doors to flat-panel slab fronts, for example. Experts also handle complex elements like veneer matching, grain filling, and finishing edges with a precision that is difficult to achieve on your own.
Choose this path if your cabinet boxes are in good condition but you want a like-new, factory-finished look, lack the time or confidence for a major DIY project, or wish to alter the fundamental design of your cabinet doors. It’s a significant upgrade that can rival the look of a full remodel for a fraction of the cost.
Side-by-Side Comparison: DIY vs. Pro
To make an informed decision, you need to see the trade-offs side-by-side. The table below breaks down the key factors, from cost to long-term impact. Use this as your at-a-glance reality check to align the project with your resources and expectations.
| Factor | DIY Cosmetic Refresh | Professional Refacing/Repainting |
|---|---|---|
| Cost Range | $300 – $1,500 | $4,000 – $10,000+ |
| Time Investment | 1-3 weekends | 3-7 days (professionally managed) |
| Skill Level Needed | Moderate DIY; patience with detail | Professional installation; no skill required from homeowner |
| Finish Durability | Good with proper prep/products; may show brush marks | Excellent; hard, factory-like sprayed finish |
| Style Flexibility | Color change; limited to existing door style | High; can change door style, add molding, etc. |
| Best For Scenario | Budget-conscious updates, quick kitchen cabinet makeovers, confident DIYers | Long-term home value, major style change, those seeking a no-hassle, durable result |
As you can see, the cabinet finish refresh you get from a pro is in a different league for durability, while the DIY route wins on speed and upfront cost. Your choice hinges on which column better describes your priorities.
Key Considerations Before You Choose Your Path
Before you buy a single can of paint or call for a quote, run through this self-assessment checklist. Your honest answers will point you to the right path.
1. Cabinet Box Condition: Open every door and drawer. Are the boxes (the carcasses) square, sturdy, and free of water damage or warping? Both paths require a solid foundation. If boxes are damaged, a full remodel may be necessary. A thorough inspection guide can help you spot potential issues.
2. True Budget: Factor in all costs. For DIY: quality paint, primer, brushes, sandpaper, new hardware, and potential tool rentals. For pros: get detailed, written quotes that specify materials, labor, and cleanup. Remember, professional quotes are often free and incredibly informative, even if you’re still deciding.
3. Skill & Patience: Be realistic. A DIY cabinet paint job is a test of meticulous prep and patience. Are you prepared to spend hours cleaning, sanding, and applying multiple thin coats?
4. Long-Term Plans: Are you refreshing to sell soon, or is this your forever home? A professional job typically offers a better return on investment and appeal to buyers, while a DIY update is perfect for enjoying your home now on a budget.

Common Cabinet Refresh Mistakes to Avoid
Learning from others’ missteps can save your project. Here are critical pitfalls for each path.
For DIYers:
- Skipping Prep: Painting over grease or gloss without degreasing and sanding guarantees peeling paint. This is the #1 reason DIY projects fail.
- Using the Wrong Paint: Wall paint won’t hold up. You need a hard, enamel-based paint formulated for cabinets and trim.
- Ignoring Grain Raise: On wood cabinets, water-based primers can raise the wood grain. Sanding after priming is essential for a smooth topcoat.
- Rushing Reassembly: Putting doors and hardware back on before the paint has fully cured leads to fingerprints and dings.
When Hiring Pros:
- Not Vetting Credentials: Always check licenses, insurance, and read recent reviews. Look for kitchen specialists, not general handymen.
- Misunderstanding the Quote: Does “refacing” include new drawer boxes? Does painting include interior shelves? Get every detail in writing.
- Choosing Overly Trendy Finishes: That ultra-matte charcoal or high-gloss pink may not age well. Opt for timeless styles for longer-lasting satisfaction.
Your Next Step to a Refreshed Kitchen
You’ve now got the map. The theory is clear, but the value comes from action. So, based on where you’re leaning, commit to one concrete step this week. If the DIY path calls to you, your mission is simple: this weekend, remove a single cabinet door and drawer front. Test your cleaning, sanding, and painting technique on the back of that door. That small experiment will tell you everything you need to know about the process ahead.
If the professional route aligns with your goals, your task is to block out time to get three detailed quotes from certified kitchen remodelers or dedicated refacing companies. Seeing those proposals will solidify costs, timelines, and the stunning possibilities for your space. Whichever path you choose, moving from planning to doing is what transforms a dated kitchen into a source of daily joy. Your refreshed cabinets are waiting.
Key Takeaways:
- The Core Choice: Your entire project hinges on choosing between a DIY cosmetic update (fast, affordable) and professional refacing/repainting (durable, transformative).
- The Non-Negotiable Step: For DIY, flawless preparation—cleaning, degreasing, sanding—is the absolute foundation of success. For hiring pros, thoroughly vetting contractor credentials is just as critical.
- Inspect Before You Invest: No matter the path, the condition of your existing cabinet boxes is the gatekeeper. Warped, water-damaged, or structurally unsound boxes rule out both refresh options.
- Budget Realistically: Factor in all material costs for DIY, and always get itemized, written quotes from professionals to avoid surprise expenses.
- Think Long-Term: Align your choice with your plans. A professional-grade update often adds more value if selling, while a DIY refresh is perfect for personal enjoyment on a budget.
Q: Can you just paint over existing cabinet finish?
A: Technically, yes, but you absolutely shouldn’t without proper preparation. Painting directly over a glossy, lacquered, or greasy surface will result in poor adhesion and peeling. The finish must be thoroughly cleaned, degreased, and lightly sanded to create a “tooth” for the new paint to grip. Using a high-quality bonding primer is also non-negotiable for a durable result.
Q: How long does a professional cabinet refacing typically take?
A: A standard kitchen refacing project by a professional crew usually takes 3 to 5 days. The timeline can extend to a week for larger kitchens or complex layouts. The process is relatively quick because the existing cabinet boxes remain in place; only the doors, drawer fronts, and visible exterior surfaces are replaced or covered with new veneer and finished on-site.
Q: Is it worth refreshing cabinets before selling a house?
A: Often, yes. Kitchens are a key selling point. Dated cabinets can be a major turn-off for buyers. A professional refacing or a very well-executed, neutral DIY paint job can significantly improve buyer perception and potentially increase your home’s value and sale speed. The key is to choose widely appealing, timeless styles and colors, not personal or trendy statements.
Q: What’s the biggest cost driver in a professional refacing job?
A: The two primary cost drivers are the material of the new cabinet doors (solid wood, MDF, thermofoil) and the labor for custom fitting and finishing. The size of your kitchen (linear feet of cabinetry) and any extra custom work, like adding new crown molding, pull-out trays, or soft-close hardware, will also substantially affect the final price.