You stand in your kitchen, coffee in hand, and your gaze lands—again—on those cabinets. They’re not broken, just… uninspiring. The thought of a full gut renovation is overwhelming, a vortex of dust, expense, and takeout containers. But what if the transformation you crave doesn’t require that level of chaos? A strategic kitchen cabinet refresh is the answer: a sequenced project with clear recovery checkpoints, not an overwhelming overhaul. It’s about working with what you have, applying a fresh finish, adding thoughtful trim, and styling for visual balance to create a space that feels entirely new. This isn’t a vague wish list; it’s a practical, actionable protocol. Following a structured cabinet update checklist turns that moment of dissatisfaction into a manageable, rewarding project with a professional-looking outcome.
A successful kitchen cabinet refresh follows a three-phase protocol: surface preparation, applying new finish and trim, and final styling for visual balance. This checklist guides you through each step with built-in quality checkpoints, ensuring you assess cabinet condition, execute your chosen finish (paint or stain), add transformative trim, and style for a balanced, cohesive look—all without the cost and disruption of a full replacement.
Phase 1: The Assessment & Prep Protocol
Every successful kitchen cabinet refresh guide begins with a clear-eyed assessment. This phase is about making key decisions and doing the unglamorous—but absolutely critical—prep work that ensures your finish will last. Rushing this step is the single biggest reason DIY refreshes fail.
Choose Your Path: Paint, Stain, or Clean
Your existing cabinets dictate your options. Painted wood or laminate is a prime candidate for a new coat of paint. Real wood with a nice grain you want to highlight? A stain or gel stain might be your best bet. If the finish is in good shape but just looks tired, a deep clean with a degreaser and a new protective topcoat can work wonders. This decision is the cornerstone of your cabinet update checklist.
The Non-Negotiable Prep Mini-Checklist
Prep is 80% of the result. Follow this sequence:
- Empty & Label: Remove all doors, drawers, and hardware. Label every door and its corresponding hinge location with painter’s tape.
- Deep Clean: Scrub every surface with a trisodium phosphate (TSP) substitute or a heavy-duty degreaser to remove years of kitchen grime and grease.
- Degloss & Sand: Lightly sand all surfaces with 120-150 grit sandpaper or use a liquid deglosser. This creates “tooth” for the new finish to grip.
- Repair & Fill: Fill any holes, dings, or gaps with a quality wood filler. Sand smooth once dry.
- Prime (If Painting): Apply a high-adhesion primer designed for cabinets. This is non-negotiable for durability and true color.
Only when every surface is clean, dull, smooth, and primed are you ready to move on. This disciplined approach turns a hopeful project into a predictable one.
Phase 2: The Finish & Trim Application Playbook
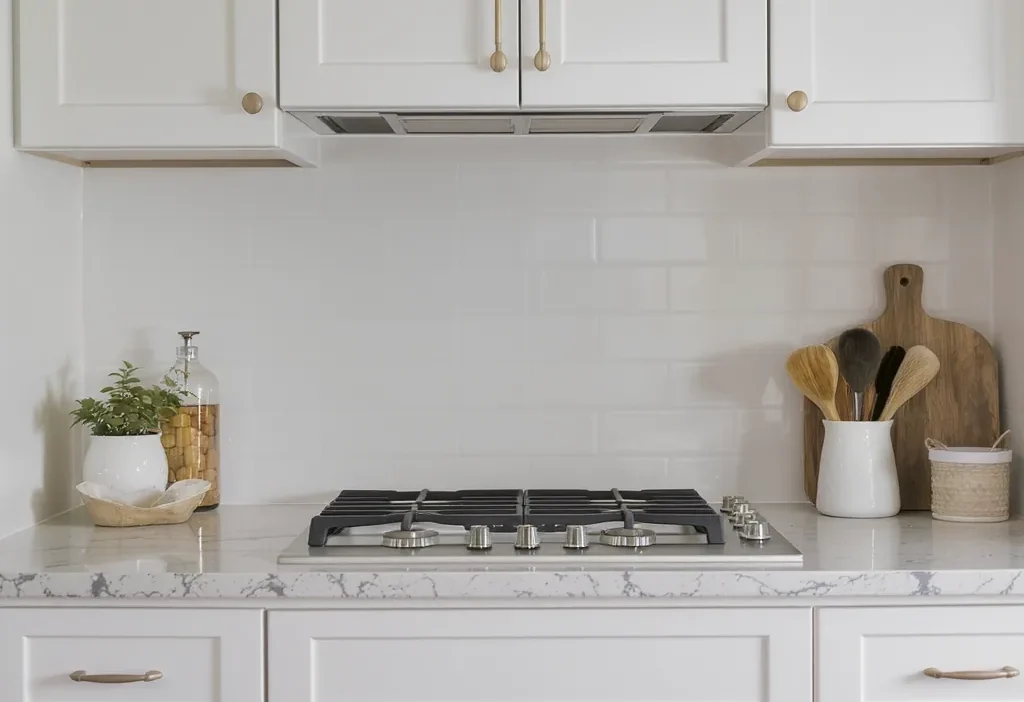
Photo by Алексей Вечерин on Pexels
This is where your cabinet finishing and trim plan comes to life. Execution matters, so work in a clean, dust-controlled environment and focus on technique over speed.
Mastering the Finish Application
For paint, use a high-quality brush for edges and a mini foam roller or a high-density foam brush for flat panels to avoid brush marks. Multiple thin coats are always better than one thick, drippy coat. For stain, apply with a cloth, let it penetrate, and wipe off the excess evenly. Allow each coat to dry fully according to the product instructions—patience here prevents tackiness and fingerprints.
Recovery Checkpoint: After your first coat dries, inspect under good light. Look for thin spots, drips, or dust nibs. Lightly sand any imperfections with 220-grit sandpaper before applying the next coat.
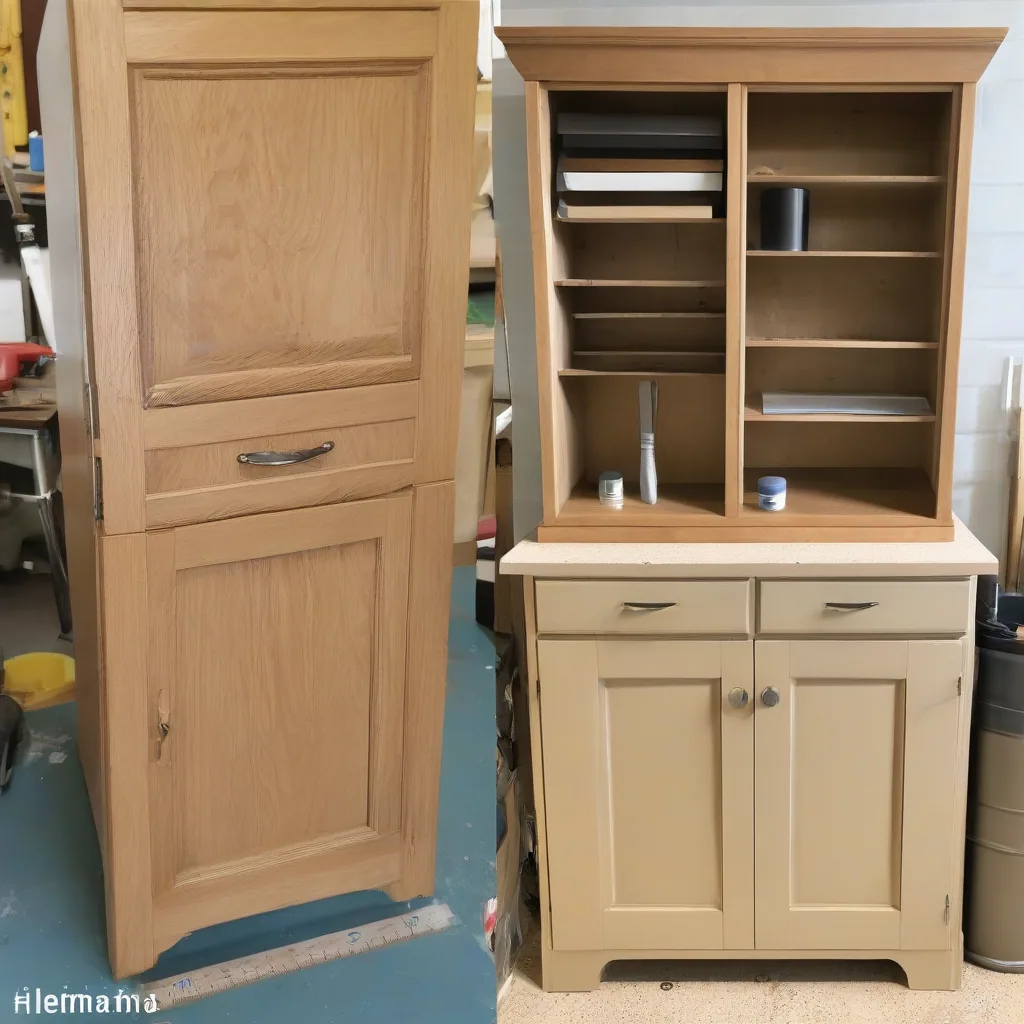
The Transformative Power of Trim
This is the secret weapon of a DIY cabinet refresh. Adding simple trim can completely redefine your cabinets’ style. Consider:
- Door & Drawer Fronts: Attach thin wood strips to flat-panel doors to create a shaker-style look.
- Toe-Kick Update: Replace a dated scalloped toe-kick with a simple, clean recessed panel.
- End Panels & Molding: Add a finished end panel to exposed cabinet sides, or install crown molding at the top for a built-in look.
Attach trim with wood glue and fine finish nails, then fill the nail holes and caulk any gaps for a seamless, professional appearance before painting.
Phase 3: The Visual Balance & Staging Finale
The physical work is done. Now, we shift to styling—the phase that makes your investment look intentional and magazine-worthy. This is your kitchen cabinet styling plan in action.
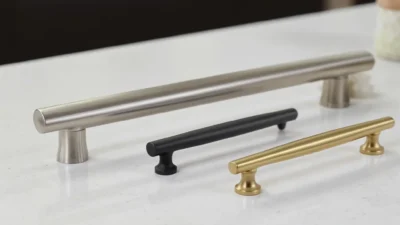
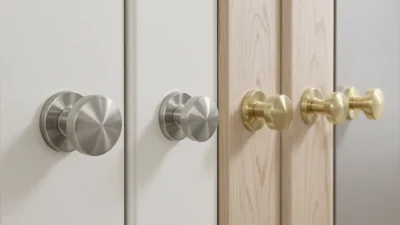
Hardware Placement & Proportion
New hardware is jewelry for your cabinets. Use the “rule of thirds” for placement: on a standard door, position pulls or knobs one-third of the way down from the top (or up from the bottom). For drawers, center them horizontally. Ensure all hardware on upper and lower cabinets aligns visually to create a balanced rhythm across the kitchen.
Introduce Visual Relief
A wall of solid cabinet doors can feel heavy. Create balance by introducing contrast. If possible, convert one upper cabinet to open shelving for displaying beautiful dishes or a cookbook. Alternatively, consider replacing a few door fronts with glass inserts. This breaks up the mass and adds personality.
Final Styling Checklist
- Declutter First: Put back only what you use and love. This is non-negotiable.
- Create Focal Points: Style open shelves or the counter in front of cabinets with intentional groupings—a stack of bowls, a trailing plant, a piece of art leaning against the backsplash.
- Mind the Gap: The space between the top of your cabinets and the ceiling? If it’s open, keep it clean or add a few large, simple baskets for texture.
- Lighting Check: Ensure under-cabinet lighting is clean and casts an even glow on your beautiful new countertops and finish.
Your Post-Refresh Quality Assurance Check
Consider this the project’s closing ceremony. About 24-48 hours after everything is reinstalled and the finish has fully cured, perform this systematic walkthrough. It’s your final protocol to catch what you might have missed in the excitement of completion.
First, inspect every door and drawer front under bright, angled light for any missed drips, dust specks, or fingerprints. Touch up with a small artist’s brush. Next, operate every hinge and drawer slide—do they open smoothly and close securely? Adjust as needed. Then, step back to the kitchen entrance. Does the visual weight feel balanced, or does one side now feel heavier? Finally, at different times of day, see how natural and artificial light plays on the new finish. This preventive review ensures your satisfaction lasts for years, not just days.
Protecting Your Kitchen’s New Look
You’ve completed a significant transformation. To protect your work, clean cabinet surfaces with a soft cloth and a mild, non-abrasive cleaner—avoid harsh chemicals or abrasive pads. Those beautiful finishes are durable, but they’re not indestructible. Most importantly, take a moment to enjoy the space you’ve revitalized. This kitchen cabinet refresh checklist wasn’t just about updating surfaces; it was about extending the life and joy of your kitchen without the upheaval of a full remodel. You’ve earned the right to admire your handiwork every time you reach for a coffee mug.