Let’s start by busting a common myth: that a peel-and-stick backsplash is just a cheap, temporary fix destined to look fake and peel off in weeks. While it’s true this product can fail spectacularly, that’s usually because it’s being used in the wrong way or in the wrong place. The reality is, for a specific and powerful niche in your kitchen refresh toolkit, it’s a brilliant solution. This guide isn’t about selling you on a trend; it’s a practical, honest look at where a peel-and-stick backsplash truly works to transform your space and where it’s almost guaranteed to become one of those frustrating backsplash update mistakes. Think of it less as a temporary band-aid and more as a strategic, semi-permanent design layer—when you apply it with clear-eyed realism.
The best way to use a peel-and-stick backsplash for a kitchen refresh is to treat it as a strategic, semi-permanent design layer, not a temporary band-aid. Success hinges on surface prep, choosing the right material (vinyl vs. flexible tile), and managing expectations for heat and moisture zones. It works brilliantly for covering dated tile or creating a focal wall, but fails as a long-term solution behind a high-splash range or on heavily textured walls.
Where Peel-and-Stick Shines (The ‘Works’ Zone)
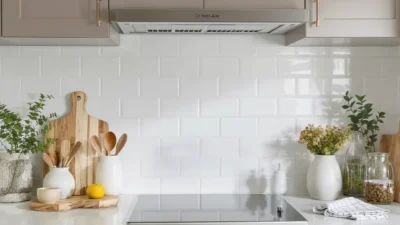
Understanding where this product excels is the first step to a successful kitchen refresh. Think of a peel and stick backsplash for kitchen refresh not as a flimsy cover-up, but as a strategic design layer. It works brilliantly in specific scenarios where its strengths align perfectly with your goals.

Photo by Aleksey Nosov on Pexels
Ideal Use Cases
This solution is a champion for several common kitchen dilemmas. First, it’s perfect for covering dated but intact tile. If you have a structurally sound but ugly backsplash, these panels can adhere right over it, saving you the messy and costly demo work. It’s also a top choice for renters or anyone avoiding permanent changes, offering a true renter-friendly backsplash that can be removed (with some care) when you move out.
For a quick visual lift, consider using it to create an accent or focal wall behind open shelving or in a breakfast nook. These are often low-splash zones where the material won’t face constant abuse. For homeowners looking to stage a house for sale, it’s a cost-effective way to modernize a kitchen’s look without a full renovation, making it one of the smartest temporary kitchen backsplash ideas for instant appeal.
The Crucial Buyer’s Filter: Material & Surface Reality Check
Your success is 90% determined before you even peel off the backing. This step is your diagnostic filter to avoid the most common point of failure: applying the product to an incompatible surface.
Material Matters: Vinyl vs. Flexible Tile
Not all adhesive backsplash panels are created equal. Vinyl sheets are thin, flexible, and best for perfectly flat surfaces. The newer “flexible tile” lookalikes are thicker, often made of a PVC or polymer, and can mimic grout lines and stone texture more convincingly. Your wall’s condition dictates which you should choose. A key resource from the University of Minnesota Extension on surface preparation for adhesives underscores the universal importance of this step for any bonding project.
The Non-Negotiable Surface Prep
The golden rule for easy backsplash installation is that the wall must be clean, smooth, dry, and flat. This means:
- Clean: Every trace of grease, dust, or wax must be removed with a degreaser and rinsed.
- Smooth & Flat: Lightly sand any gloss on paint. Heavily textured walls (like orange peel or knockdown) are an instant fail—the adhesive can’t make full contact.
- Dry: No moisture. This rules out applying it directly over existing wallpaper, which can trap dampness.
If your wall doesn’t pass this filter, your DIY backsplash update will likely end in peeling and frustration. It’s better to address the wall first or consider a different solution.
Common Installation & Performance Pitfalls
Even with a good surface, specific missteps can derail your project. These are the predictable backsplash update mistakes that lead to a cheap look or early failure. Knowing them is your best defense.
Pitfall 1: Skipping the Primer (On Porous Surfaces)
What Happens: Applying panels directly to porous surfaces like new drywall, raw plaster, or unsealed masonry. The adhesive bonds to the loose top layer, which then pulls away from the wall itself.
The Result: Edges lift, corners curl, and entire sections can fall off within weeks.
Pitfall 2: Rushing Layout & Ignoring Seams
What Happens: Starting in a corner without checking for level, or not dry-fitting panels to plan the pattern. Seams between sheets are misaligned or gape open.
The Result: A visibly crooked, amateurish installation. Gaping seams become dirt traps and highlight the “stick-on” nature of the product.
Pitfall 3: Poor Handling of Obstacles
What Happens: Trying to awkwardly cut around outlets, switches, or pipes with scissors or a utility knife without precise measurements.
The Result: Jagged, uneven cuts that look messy. Panels may not sit flat against the wall, creating a starting point for peeling.
Pitfall 4: Ignoring Environmental Realities
What Happens: Installing a standard removable backsplash directly behind a high-output gas range or in a steam-heavy zone above a dishwasher.
The Result: Constant heat can weaken the adhesive, while steam and direct, heavy splashes can seep behind seams, causing failure. This is where it truly fails as a long-term solution.
Making It Last: Pro Tips for a ‘Permanent’ Feel
You can elevate your peel-and-stick project from “temporary fix” to a semi-permanent design feature that lasts for years. These pro tips maximize longevity and create a polished, intentional look.

Seal the Deal at the Edges
The most vulnerable spots are the perimeters. After installation, run a thin bead of clear, waterproof silicone caulk along the top edge where the backsplash meets the countertop and at side edges where it meets cabinets or walls. This seals out moisture and food particles, preventing the slow creep of peeling. It’s the single biggest upgrade for a kitchen backsplash alternative meant to last.
Master the Cutting Process
For a professional finish, use a sharp utility knife and a metal straightedge. For outlets, make a paper template first, then transfer the shape to the panel. For intricate cuts, a pair of sharp scissors can offer more control than a knife. Taking this extra time makes the temporary backsplash solution look anything but temporary.
Post-Installation Care
Treat it gently for the first 48 hours to allow the adhesive to fully set. After that, clean with a soft cloth and mild cleaner—avoid abrasive scrubs or harsh chemicals that could damage the finish. By managing its environment and treating it with care, you transform a simple DIY backsplash update into a durable and satisfying kitchen refresh.
A Smart Tool for the Right Job
A peel-and-stick backsplash is a valid and powerful tool in your home update arsenal, but its value is entirely dependent on using it with clear-eyed realism. It’s not a magic fix for every kitchen woe, nor is it a cheap substitute for tile in high-abuse areas. Instead, it shines as a transformative, non-permanent layer for covering flaws, testing bold designs, or modernizing a space on a budget and timeline that works for you.
By respecting its strengths—where it truly works—and diligently avoiding the common pitfalls, you can achieve a kitchen refresh that looks intentional, feels fresh, and serves you well for years. The key is to see it not as a last-minute band-aid, but as a strategic choice for your specific situation.